Independent on the move with a solar bag - Sun Folder 200W in the test
- lillyontour.de

- Jul 7, 2025
- 8 min read
We test the 200W Sun Folder solar bag from WATTSTUNDE in everyday van life
(unpaid advertising)
As enthusiastic motorhome travelers, we know how important independence on the road is. Whether camping in the wilderness, on remote pitches or simply to be flexible - a reliable power supply is worth its weight in gold. For this very reason, we looked into the subject of mobile solar energy in detail and finally decided on the Sun Folder 200W solar bag. Here is our first experience report:

Why a solar bag? Our motivation
Our everyday life while traveling is characterized by the use of various electronic devices. From charging our smartphones and cameras to powering our laptops for work and smaller consumers such as hairdryers or lights - all of these require a constant power supply. However, the dependence on campsites with electricity or the constant search for power sockets limits our freedom and spontaneity considerably. We love exploring remote places and enjoying nature to the full, and a self-sufficient power supply is worth its weight in gold.
The decision to opt for a portable solar solution such as the solar bag was an easy one, as it offers several decisive advantages over permanently installed solar modules on the roof. Firstly, installation is extremely simple and does not require any permanent structural changes to the vehicle. Secondly, the flexibility of the solar pocket enables optimum alignment with the sun. While permanently mounted panels are often only a compromise, we can reposition the solar pocket at any time to achieve the maximum yield - be it in the morning, midday or evening, or when we park in the shade and can place the solar pocket in the sun. This is particularly advantageous in wooded areas or when the position of the sun changes. In addition, the solar bag can be stowed away quickly when not in use and hardly takes up any space, which is an important aspect for us in Vanlife.
The Sun Folder 200W solar bag in detail
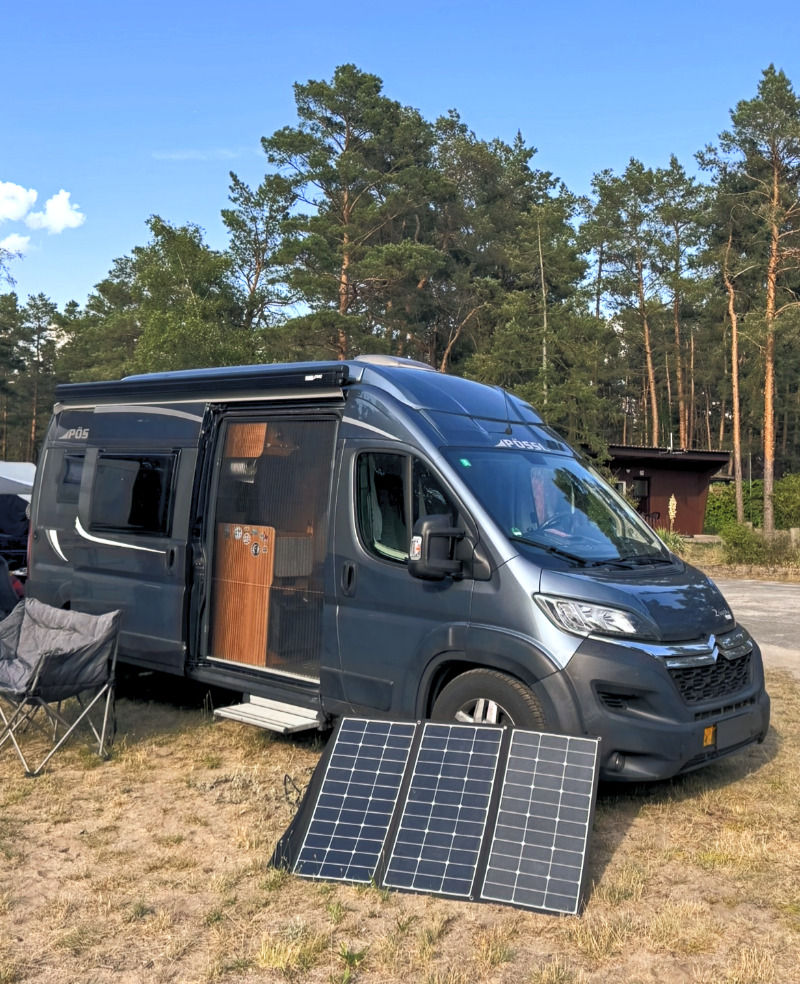
After extensive research and a lot of positive feedback from the camper community, we chose the WS200SF-HV SunFolder solar bag from WATTSTUNDE. When unpacking, the high-quality workmanship and compact design are immediately noticeable. The bag is robust and well padded, which makes transportation and storage easier. In addition to the solar bag itself, the scope of delivery also includes a 5 meter long connection cable with Anderson plug, which enables flexible positioning, as well as the necessary adapters for connection to various charge controllers or power stations.
The solar pocket is equipped with so-called monocrystalline solar cells, which have a high efficiency of up to 24%. This is particularly important if you want to achieve good performance even in less than ideal conditions. The dimensions when closed are very compact at approx. 600 x 535 x 45 mm; when opened, it measures approx. 2200 x 535 x 28 mm. The weight of around 6.8 kg makes it easy to transport, even if it is not the lightest on the market.
A particularly positive feature is the plug & play capability thanks to the practical plug-in system. The long cable is a great advantage, as it allows us to set up the bag at some distance from the vehicle in order to capture the sun optimally. One small disadvantage that is mentioned in some reviews and which we can confirm is the susceptibility to wind. In stronger winds, the bag must be weighted down or secured to prevent it from tipping over. It is also not always waterproof, which should be taken into account in rainy weather. Despite these minor limitations, the advantages of high efficiency and easy handling outweigh the disadvantages for us.
Installation and commissioning
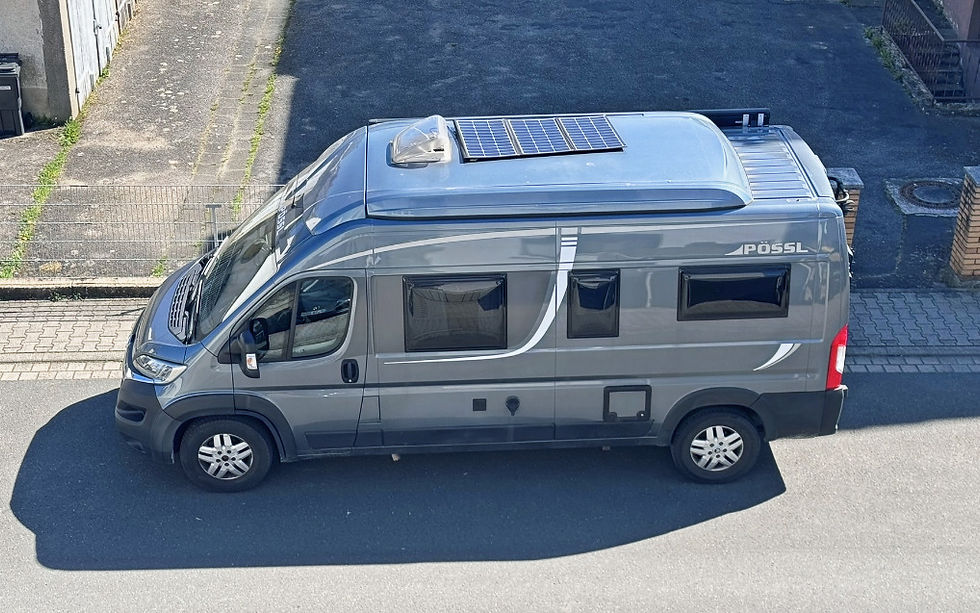
Installing the solar bag is relatively straightforward in itself. However, the preparatory work took us some time, as we first had to install the charge controller and then connect it to our supply battery/board battery. The charge controller is a crucial component as it regulates the voltage and current generated by the solar panel in order to charge the battery efficiently and safely and prevent overcharging. We opted for an MPPT charge controller (75 | 15), as it finds the maximum power point of the solar panel even in changing light conditions and thus ensures the highest possible yield. It was also recommended to us as part of the set.
The supply battery of our Citroen Pössl 2Win Plus is located under the passenger seat. We had a few tricky challenges here. In order to access the batteries and connect the charge controller properly, the passenger seat had to be loosened and partially removed. Yes, this requires a little patience and the right tools, as the screw connections are often difficult to access and the wiring for the seat heating or airbags must also be taken into account. Our tip: Take photos of the wiring in advance to carefully document the individual steps so that you don't run into any problems when reassembling later. Reinstalling the seat and laying all the cables correctly can also require a little patience, but with care it can be done well and the effort is worth it for a clean and safe installation. In total, it took us about 2-3 hours to install the charge controller, including connecting it to the battery, and most of that time was spent removing and reinstalling the passenger seat. We routed the short cable, which is connected to the battery, through the plastic cover on the side of the passenger seat. Simply drill a small hole and you're done.
After connecting the cable to the charge controller and the battery, the charge controller starts working automatically. It is best to place the solar bag directly in the sun. In fact, even a small shadow cast on a cell can affect the performance of the entire module.
We monitor the charging process via the charge controller display and the associated VictronConnect app (for IOS Apple smartphones, for Android cell phones). Here you can track the current charging power, the battery status and the daily yield. It's really cool to see how the wattage skyrockets in direct sunlight and how our battery is recharged in no time at all.
The right orientation is also important! To achieve the maximum yield, you have to realign the solar panel several times a day if necessary. If you are at the camper anyway, this is not a problem. If you're on the road, it's more difficult. We have therefore got into the habit of placing the bag on the roof (and routing the cable through the roof hatch) when we leave the van for longer periods (not recommended if there is too much wind!).
Practical test: Our experiences in operation
Once we had successfully installed and commissioned the Sun Folder 200W solar bag, the most exciting part began: the practical test under real travel conditions. We have now been using the solar bag for several weeks and have been able to gather valuable experience that we would like to share.
The output of the solar pocket naturally varies greatly depending on the weather conditions and the intensity of the sun. On a sunny day with a clear sky and optimal orientation, we were actually able to achieve peak values of up to 160-180 watts. Although this is below the rated output of 200 Wp, it is a realistic value, as the rated output is determined under laboratory conditions (STC - Standard Test Conditions), which are rarely achieved in practice. Nevertheless, we are very satisfied with this yield, as it is sufficient to quickly recharge our batteries and cover our daily energy requirements.
In cloudy skies, partial shade or even if the bag is placed behind the windshield in the car, the output drops. However, this shows the efficiency of the monocrystalline cells, which still deliver a good yield even in diffuse light. We found that even on cloudy days, sufficient power was generated to ensure the basic power supply for our devices. The ability to align the bag flexibly is a great advantage here, as it allows us to find the best possible angle to the sun even in changing light conditions.
Here are the most important advantages from our perspective:
High yield: even if the 200Wp is not always achieved, the actual yield is more than sufficient for our needs.
Flexibility: The ability to realign the pocket at any time is a decisive advantage over permanently installed panels.
Easy handling: Assembly, connection and stowage are done quickly.
Compact design: The bag takes up little space when folded.
And here are the most relevant disadvantages from our point of view:
Susceptibility to wind: In strong winds, the bag must be secured to prevent it from tipping over..
Not completely waterproof: The bag should be protected when it rains.
Manual alignment: Requires regular attention to achieve maximum yield.
Overall, however, the advantages clearly outweigh the disadvantages for us.
Tips & tricks for solar bag users
To get the best out of your solar bag and enjoy it for a long time, we would like to give you a few tried-and-tested tips and tricks along the way:
Efficiency:
Optimal alignment: As already mentioned, alignment with the sun is crucial. Use the integrated stands and realign the bag several times a day to optimize the angle of incidence of the sun's rays. A simple shadow on one part of the module can drastically reduce performance. So make sure that the entire surface is unshaded.
Regular cleaning: Dust, dirt, pollen or bird droppings can reduce the performance of your solar panel. Clean the surface of the modules regularly with a soft cloth and clean water. Avoid aggressive cleaning agents that could damage the surface.
Charge controller: Invest in a high-quality MPPT charge controller. Although these are more expensive than PWM controllers, they get significantly more energy out of your solar panel, especially in changing light conditions and at lower temperatures.
Storage, transportation, maintenance:
Store in a dry place: Store the solar bag in a dry place to avoid moisture damage. Even if it is designed for outdoor use, dry storage is always better when not in use.
Secure it in the vehicle: While driving, the solar bag should be securely stowed so that it does not slip or fly around and cause damage.
Check cables and plugs: Regularly check the cables and plugs for damage or corrosion. A good connection is crucial for power transmission.
No overloading: Make sure that you do not overload the solar pocket. The rated power is a guide value and permanently exceeding it can affect the service life.
What you should generally look out for before buying a solar bag:
Determine your energy requirements: Before you buy a solar bag, determine your actual energy requirements. Which devices do you want to operate? For how long? This will help you to determine the required power (Wp) of the solar bag.
Battery capacity: The solar bag must match the capacity of your battery. A solar bag that is too small will take forever to charge a large battery; a solar bag that is too large may be oversized.
Connections: Check which connections your power station or charge controller has and whether the solar bag has the right plugs or whether adapters are required.
Weight and dimensions: Weight and pack size are particularly important in vanlife. Compare different models and choose a solar bag that fits well in your vehicle and is easy to handle.
Efficiency: Pay attention to the efficiency of the solar cells. Monocrystalline cells are generally more efficient than polycrystalline cells, which is particularly noticeable in less than ideal light conditions.
Our conclusion
The Sun Folder 200W solar bag has fully met our expectations and proved to be an excellent addition to our travels. It gives us the freedom and independence we want to be self-sufficient off the beaten track. The ease of use, good yield and compact design make it an ideal companion for anyone who wants to cover their own energy needs while on the move.
Recommendation (on our own behalf, unpaid advertising): We bought our Sun Folder solar bag from WATTSTUNDE from the Solarkontor online store (attention: it´s a german onlineshop) and were extremely satisfied with the service and delivery. That's why we can highly recommend it to you. The price was discounted at the time and was EUR 359 including shipping (as of March 2025) for the solar bag including cable and charge controller.
Fancy sustainable Vanlife products?
Then browse through my online store


Eure Betonung der 'Unabhängigkeit unterwegs' und die Motivation, sich von der Abhängigkeit von Campingplätzen zu lösen, spricht mir aus der Seele. Genau diese Freiheit und Spontaneität machen das Vanlife erst wirklich besonders. Es ist ein Game-Changer, nicht ständig nach Steckdosen suchen zu müssen. Manchmal können aber auch unerwartete Herausforderungen oder technische Probleme im Vanlife zu Frustration führen, besonders wenn die Stromversorgung mal nicht wie gewünscht funktioniert. In solchen Momenten kann es hilfreich sein, sich mit Strategien zur Wutbewältigung auseinanderzusetzen, um gelassen zu bleiben und Lösungen zu finden.
Es ist faszinierend, wie oft die Bedeutung von Metadaten in digitalen Bildern unterschätzt wird. Dabei spielen sie eine entscheidende Rolle für die Organisation, Authentizität und sogar die Privatsphäre. Viele übersehen, welche Fülle an Informationen in jedem Schnappschuss steckt, von Kameramodell bis zu Geotags. Gerade wenn es um die genaue Analyse und das Verständnis dieser eingebetteten Daten geht, tauchen oft Fragen auf. Für alle, die tiefer in dieses Thema eintauchen und detaillierte Informationen zu EXIF-Metadaten suchen, ist eine spezialisierte Quelle unerlässlich.